Showing posts with label Entertaining. Show all posts

Tuesday, May 27, 2014

Warm Fig & Goat Cheese Appetizer

I had the most amazing warm fig appetizer while dining at a five star restaurant nearby a few years ago and have looked on many a menu since then, and have not found anything like it.

So, I begun searching the web and experimented with a couple fig appetizers and this was my favorite.


The original recipe is on Yumsugar website but the ratios were a bit too much goat cheese, so following is my variation with less goat cheese with increase sweet syrup ratio.  The balsamic and honey combination is fabulous!  My photos don't do justice to the rich and decadent flavors, but I promise these are little bites of heaven.


INGREDIENTS:
  • 1 dozen figs
  • 1 Tbls unsalted butter
  • 3 Tbls balsamic vinegar
  • 3 Tbls honey
  • 2 oz fresh goat cheese
  • 1 pinch Kosher salt
Preheat the oven to 400ºF.  While the oven preheats, melt the butter in a small saucepan, along with the balsamic vinegar, honey, and a hefty pinch of salt. Bring to a boil, then reduce to a simmer and cook about 5 minutes, or until slightly thickened.  Place the figs, cut side up, in a baking dish the size of a pie pan. Top each fig half with a 1/2 teaspoon to 1 teaspoon of goat cheese. Drizzle the balsamic vinegar syrup over the figs. Roast in the oven until very soft, 10 to 15 minutes.
Serve on a platter sprinkled with coarse salt.


Monday, May 26, 2014

Shrimp Cocktail with a Twist

This twist on traditional shrimp cocktail is one of my favorite summer dishes, or any season for that matter.  It can make the perfect appetizer if you serve smaller portions, but we also enjoy as our main course, served together with a bowl of clam chowder.
 

The serving glass presentation also makes it special.  I serve this in an ice cream cone sundae dish, or a martini glass is perfect for an appetizer portion.   I originally found this recipe in the Los Angeles Times newspaper, food section year ago.  I have altered a few ingredients and my recipe variation is below.


I found this tastey ketchup recipe on Portugese Girl Cooks blog. 
Homemade Ketchup 
  • 1 Tbl olive oil
  • 1 medium onion, chopped
  • 3 cloves garlic, minced
  • 1/2 cup apple cider vinegar
  • 1/4 cup red wine vinegar
  • 3/4 cup brown sugar
  • 1 tsp salt
  • 1 tsp dijon mustard
  • 1 – 28 oz can crushed tomatoes, preferably unsalted
Directions:
1. In a medium saucepan,  over medium- high heat, heat the olive oil, add the chopped onion and garlic, and cook for about 5 minutes, until softened. Add both vinegars, sugar, salt, and mustard. Bring to a boil. Add the crushed tomatoes, bring to a boil and reduce the heat to medium low. Continue to cook until the sauce has reduced by about half, about 25 minutes. Remove from the heat and puree in food processor, blender, or with immersion blender (my choice), until smooth.
Can be stored in the refrigerator for 3 weeks.

Wednesday, January 29, 2014

Super Bowl Party - T.V. Commercials BINGO

I LOVE football and no matter which team has made it to the Super Bowl, we always get together with at least 1 or 2 family or friends or have a larger party and watch the game.  Football+Friends+Snacks+Family+Drinks+More Food = P.A.R.T.Y.

Unfortunately, not all my girlfriends enjoy football, so last year I came up with this BINGO game to keep even non-football fans sitting with the rest of us in front of the television... but focused on the C.O.M.M.E.R.C.I.A.L.S!!

Over the years, Super Bowl game commercials have taken on their own life and are incredibly entertaining.  So... why not have these T.V. Commercials - BINGO cards on hand this weekend, ready to play and keep the stragglers involved in the game (sort of).
Besides, it's fun and competitive, and even the die hard football fan might join in!!!
Print the Bingo cards on heavy card stock. Free Printable 2014 BINGO Card download HERE
Use pretzels or coins as your markers ...
and mark the matching square when you see the described subject in a commercial...

 ...buy a $10 Starbucks card for a prize ... and start the game after kick-off! 

SAMPLE Commercial Squares:
  • Talking Baby
  • Beer Commercial
  • Potato Chips
  • Truck Commercial

The winner is the first person to mark five squares in a row. 
The winning five squares must be either in a row, down one column or diagonally across.
Last year, we had a winner by the middle of the second quarter, so see how long it lasts before you hear B.I.N.G.O!!

Denver BRONCOS or Seattle SEAHAWKS?!?!  

At least you'll have pretzels to eat as you cheer on your team ... or focus on the COMMERCIALS!!


Monday, January 20, 2014

Pretzel Rods

I was looking for something new for a colorful baby shower dessert type treat, and stumbled upon chocolate dipped pretzel rods on Pinterest.  It looks like these have been around for awhile, although I'd never seen them before, which is another reason I LOVE Pinterest!


INGREDIENTS:
  • Pretzel Rods
  • Candy melts (I prefer Wilton here)
  • Microwave safe container with some depth for dipping pretzels
  • Sprinkles to decorate

First you need to melt your Candy Melts according to microwave instructions on the package.  While you do not need a measuring cup for measuring, I used my microwave safe measuring cup as reference for the depth in dipping my pretzel rods.  The cup was deep enough to cover over 1/3 of the pretzel with vanilla chocolate and helped me keep all pretzel coatings similar in length.


I forgot to take any pictures of the dipping process, but one thing worth sharing is how to keep the dipped pretzel coating smooth while it hardens.  I tested laying the freshly dipped pretzels on wax paper while the candy hardened, but this resulted in the candy coating becoming flat on one side which did not look good.

The solution: Use a container of rice from your pantry to hold the pretzel rods upright while the melted candy hardens smoothly! (I was careful and somehow avoided leaving any blue sprinkles behind in the rice... but I will laugh if little bits of blue sugar show up in any future cooked rice!  :)

It worked best to dip pretzels with melted chocolate first and let them partially dry for a few minutes before covering with the sprinkles.  Once I had covered 3 to 4 pretzels with chocolate, I was able to return to pretzel #1 and add sprinkles, since the chocolate was still soft but not runny.  Otherwise my sprinkles just ran down the wet melted candy.  I could then continue the sequence with 3 to 4 pretzels at a time until all were dipped in chocolate and sprinkles.


To achieve the double drizzled effect, I let the base candy layer completely dry and then placed the hard coated pretzels on wax paper to drizzle the second candy color.  Dip a spoon in the melted chocolate and swing it back and forth over the pretzels for a drizzle pattern.  Once the first drizzled chocolate dries, rotate the pretzel so you can drizzle the back side to complete all around.

It was so fun to work with two colors of candy melt plus two types of sprinkles and end up with so many variations of the two color patterns.
The entire process of candy coating one bag of pretzel rods took only about 2 hours and I was thrilled with the results!

The final color decorated combination worked well with these Square Pretzel treats together on the same table.


Sunday, January 19, 2014

Square Pretzel Treats

I love salty savory flavors mostly, but still have a sweet tooth, so here's the perfect bite size treat that's salty sweet.  Square pretzel snaps topped with chocolate and caramel.
These salty sweet treats are quick and easy, perfect for snacking.  You can also color coordinate for any party treat.  I used Wilton Candy Melts for the chocolate portion which comes in the perfect round shape and various colors.

INGREDIENTS:
  • Square Pretzel snaps
  • Candy melts (Wiltern - vanilla)
  • Caramel squares (optional)
  • M&M's
I bought Wilton Candy Melts at JoAnn's, but you can also find at Party City or Michael's.
Preheat oven to 350 degrees. Place pretzels on a cookie sheet and top each with a round candy melt. 
If you do not wish to add caramel, place the candy covered pretzels in the oven. The candy melt needs to soften, which usually takes at least 1 minute or up to 2 minutes, but cooking time may vary for each oven.  It's best to test your oven by checking every 30 seconds until the candy is just soft.  Do not heat more than 2 minutes or the candy will melt too much, become runny and lose shape.

After you take out of the oven, immediately press an M&M in the center.  Push just enough so it will set.  Don't worry if a few pretzels break, as you will learn how much pressure to add once you test a few times.  Work quickly or have your kids help with this part before the candy melts firm up.

If you're adding the piece of caramel, cut each caramel square into 8 smaller pieces.  For best results with caramel, make sure to cut the caramel square into thin pieces.  I first cut lengthwise and then cut each thin half into quarters for a total of 8 small pieces from each caramel square.  
Cooking or melting usually takes up to 2 minutes if you also add caramel on top. Continue to test timing with your oven, but will need to heat a bit longer than heating with only candy melt.
You will also need to press a bit harder with caramel on top, which is why the thin pieces of caramel help melt similar to candy melting.
It takes about an hour for the candy melts to set, but you can put in the refrigerator for 15 minutes if you're in a hurry to serve. 

If you leave these out on the counter, they will not last long.  They also make a great party compliment to pretzel rods that I made here. 

Enjoy these colorful salty sweets!


Thursday, January 16, 2014

Peanut Butter & Vanilla Cookies

If you're looking to make an easy sweet treat, these Peanut Butter Vanilla coated cookies are perfect.

I made these as a baby shower party favor and they're always a big hit for anyone who loves peanut butter.

We grew up making these and got the original recipe from my Mom's best friend Jan, who's from Kansas and refers to them as her Kansas Cookies.  As the story goes, all her relatives back in Kansas make these!

There are only three simple INGREDIENTS:
  • Creamy Peanut Butter
  • Ritz crackers
  • CandiQuik - Vanilla flavor (Chocolate type coating)
I like CandiQuik Vanilla as a coating because it's simple to melt, easy to work with and not as rich as white chocolate.  You can substitute white chocolate or other almond bark coatings if preferred, but I can always find CandiQuik here, at Stater Bros Markets and I also heard it's available at Target.
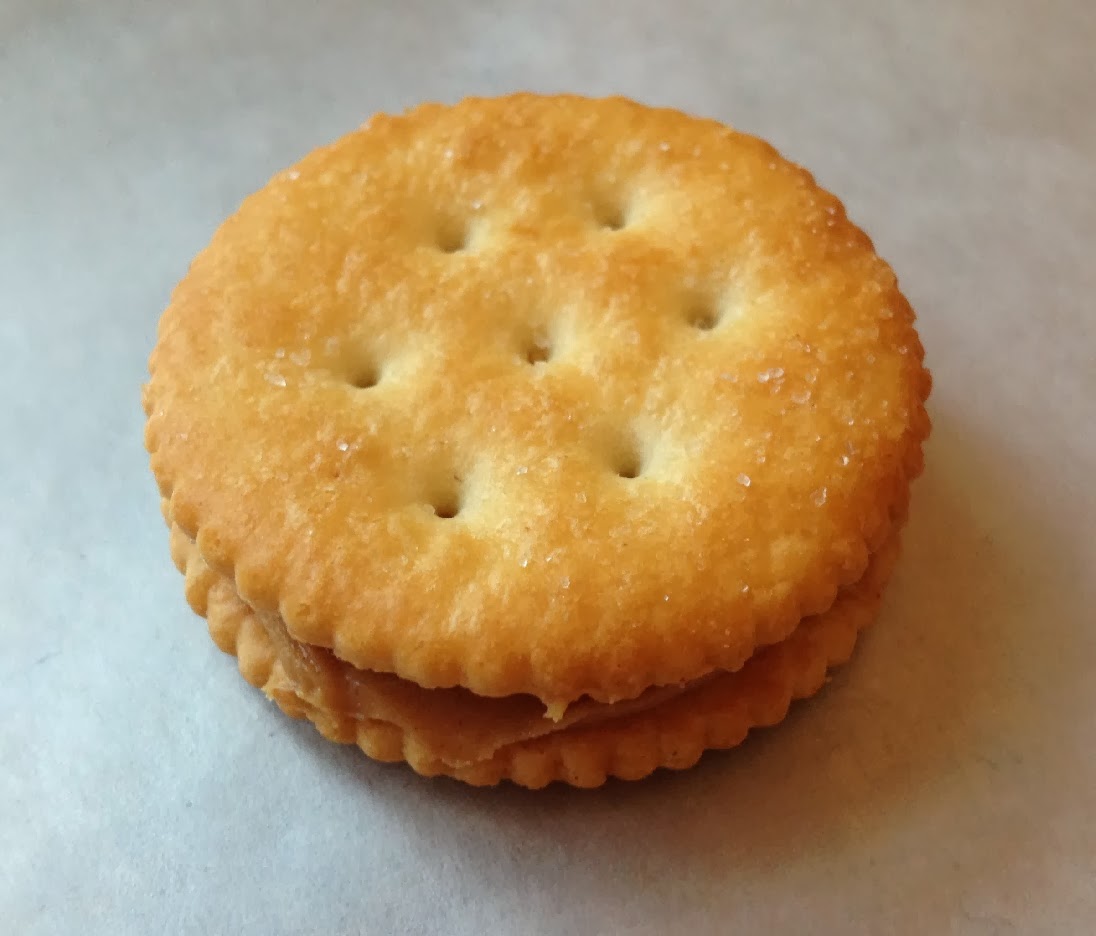
First cover a tray with wax paper and set aside.  To make the cookies, I start by spreading a generous portion of creamy peanut butter on a Ritz cracker.  It tastes best to coat generously because who doesn't LOVE peanut butter!
I add a second Ritz cracker on top of the peanut butter...
...to make a Ritz sandwich.
I make all my Ritz sandwiches in bulk before coating them.
 
Making these cookies in stages goes faster and the coating process is all about timing.  So once I have all my crackers done, I melt the CandiQuik.  Be sure to follow the melting instructions exactly as noted on the package.  Melt in the cardboard tray provided in the package or I prefer a small deeper microwave safe dish (it's easier to have some depth with the melted coated for dipping).  Start by melting for 60 seconds in the microwave.  Take out and stir.  Microwave in 30-second intervals, stirring every 30 seconds until just melted consistency.  It usually takes me a total of 2 minutes (first 60 seconds, plus two 30-second additional meltings), but time could vary depending on your microwave.
Once the vanilla CandiQuik is melted, I use tongs and dip the Ritz cracker sandwiches in and submerge, to fully coat them.  After quickly dipping them, I use a big spoon to coat all sides if there is any Ritz cracker showing.  I let the excess coating drip back into the container as I like a thinner layer of coating.  Place the coated cookie sandwich on the wax paper covered tray to set.  They should be dry in 5-10 minutes.  Work quickly as the coating thickens shortly, but can easily be reheated for 30 seconds more.
That's it!  Very simple.
They're great to eat and won't last long.  Because of the smooth white colored vanilla coating, I often use them for either bridal or baby shower party favors.  I wrap in a small cellophane bag with tied ribbon.  You can always add an embellishment, and your guests will all want the recipe!


Wednesday, November 20, 2013

Burlap Placemats DIY

Burlap is popular this season, so I wanted to make something and found these simple placemats at StoneGable and they were so easy (I'm not kidding)!
 
These are great for fall table settings, but all you need to do is change the accents and you could use them year round.  Add some blues and seashells as a center piece and you can use all summer too.
 
All you need is some burlap ribbon (10 yards per place mat), tape measure, scissors and glue gun.  I used 1-1/2" wide burlap ribbon with wired edges for a 13.5" x 18" placemat.  Wired edges gives the ability to reshape when needed and I like a border along the length of the ribbon.
 
Cut 9 pieces of burlap 20" long for the horizontal strips
Cut 12 pieces of burlap 15" long for the vertical strips


Lay all horizontal strips down in rows and weave the vertical strips over one horizontal strip and then under the next until you have woven through all 9 horizontal lengths.  Repeat this with the remaining 12 vertical strips and tighten the strips close together to minimize any gaps.
 
 
I found it easier if I started in the middle and worked from either end.  You will want to leave 1/2" on all ends for gluing. The extra length of each strip allows you to trim the ends to an even measurement after you have completed weaving in case the burlap has frayed during the weaving.
 
To glue the edges underneath, the method depends on whether it's a top row or bottom row edge.  On the strips that end on top of a strip, apply hot glue and fold the strips 'over' and glue underneath on the back side.  For the strips that end the row "under" a strip, first glue the end back on top of the same strip so the fold butts up flush with the outer edge of the strip lying on top.  You then glue this folded end up under the back side of the top layer to give an even edge. 
 
 Even if it's not perfect, it looks good once you add your place settings.


 This was such an easy project and I LOVE the results !!